7-Day Patagonia Road Trip Itinerary: El Calafate to Torres del Paine
The ultimate week-long Patagonia road trip combining Argentina's glaciers and Chile's iconic national park. Complete day-by-day itinerary with driving routes, hiking recommendations, accommodation options, and practical tips.
7-Day Patagonia Road Trip Itinerary: El Calafate to Torres del Paine
This is THE Patagonia road trip. In just seven days, you'll experience the absolute highlights of southern Patagonia: Argentina's most accessible glacier, the best trekking in South America, a thrilling border crossing, and Chile's most iconic national park. This itinerary combines the turquoise lakes of Los Glaciares National Park with the granite towers and wildlife of Torres del Paine—all connected by some of the continent's most spectacular driving.
Perfect for first-time Patagonia visitors with limited time, this route delivers maximum impact without the exhaustion of a 14+ day marathon. You'll witness calving glaciers, hike beneath jagged Andean peaks, cross international borders, spot guanacos and condors, and return home with a camera roll that will make your friends question if you Photoshopped those landscapes (you didn't).
Quick Stats:
- Total Driving: ~900 km (560 miles)
- Longest Drive: 350 km (Day 7: Torres del Paine to Punta Arenas)
- Border Crossings: 1 (Argentina → Chile, Day 5)
- Best Time: November through March (summer)
- Budget Estimate: $1,400-$2,800 per person (mid-range)
- Difficulty: Moderate (some long drives, intermediate hiking optional)
- At a Glance: 7-Day Overview
- Day 1: Arrive El Calafate
- Day 2: Perito Moreno Glacier
- Day 3: El Calafate to El Chaltén
- Day 4: Fitz Roy Trekking Day
- Day 5: El Chaltén to Puerto Natales (Border Crossing)
- Day 6: Torres del Paine National Park
- Day 7: Torres del Paine to Punta Arenas, Depart
- Planning Essentials
- Accommodation Recommendations
- What to Pack
- Budget Breakdown
- Frequently Asked Questions
Daily Summary Table
| Day | Route | Distance | Drive Time | Highlights |
|---|---|---|---|---|
| 1 | Arrive El Calafate | - | - | Pick up car, explore town, lakefront sunset |
| 2 | El Calafate → Perito Moreno → EC | 160 km | 3-4 hours | Glacier viewpoints, boat tour, ice trekking option |
| 3 | El Calafate → El Chaltén | 220 km | 3 hours | Drive to trekking capital, afternoon hike |
| 4 | El Chaltén (full day) | - | - | Laguna de los Tres OR Laguna Torre hike |
| 5 | El Chaltén → Puerto Natales | 330 km | 6-7 hours | Border crossing, arrive Chile evening |
| 6 | Puerto Natales → Torres del Paine | 200 km | 5-6 hours | Park circuit: Salto Grande, Grey Glacier, wildlife |
| 7 | Torres del Paine → Punta Arenas | 350 km | 5 hours | Morning wildlife, drive to airport, fly out |
Total: ~1,260 km (including day trips)
Routing Logic
This itinerary follows a logical south-to-north flow through Argentine Patagonia before crossing into Chile for the grand finale at Torres del Paine. You'll:
- Start in El Calafate (Argentina's main Patagonia hub with reliable international connections)
- Visit Perito Moreno Glacier while based in El Calafate
- Drive north to El Chaltén (the world's trekking capital)
- Cross into Chile via the efficient Cancha Carrera/Cerro Castillo border
- Finish with Torres del Paine (saving the most iconic for last)
- Depart from Punta Arenas (Chile's southern airport)
Why This Direction?
Flying into El Calafate (Argentina) and out of Punta Arenas (Chile) is typically cheaper and more convenient than the reverse. This routing also means you're progressively building toward Torres del Paine rather than experiencing it first (which would make everything else anticlimactic).
Driving: None (or 20 km from airport to town if arriving by air) Accommodation: El Calafate Highlights: Car pickup, town exploration, Lago Argentino sunset
Morning/Afternoon: Arrival and Car Pickup
Most travelers arrive at El Calafate Airport (FTE) on morning flights from Buenos Aires. The airport is compact and efficient—you'll be through immigration in 30 minutes on most days.
Car Rental Pickup:
If you pre-booked with a major agency (recommended), their desk will be in the arrivals hall. Budget 30-45 minutes for paperwork. Critical checks before leaving the lot:
- Document all existing damage with photos/video (Patagonian gravel roads are tough on vehicles)
- Verify spare tire condition and jack location
- Confirm cross-border authorization paperwork (you'll need this on Day 5)
- Get the 24/7 roadside assistance number
- Ensure you have at least 3/4 tank (first task: find a gas station)
Arriving Without a Flight?
If you're already in Argentina and driving from elsewhere, you'll enter El Calafate from the north via RN 40. The approach road offers stunning first views of the turquoise Lago Argentino.
Afternoon: Settle In and Explore El Calafate
Drive into town (15 minutes from airport) and check into your accommodation. El Calafate is compact—most hotels are within a 1 km radius of the main street, Avenida del Libertador.
Afternoon Activities:
Stroll Avenida del Libertador:
This pedestrian-friendly main street is lined with outdoor gear shops, tour agencies, restaurants, and chocolate shops. Key stops:
- Laguna Nimez Reserve (south end of town): Easy 2 km nature walk with birdwatching (flamingos, black-necked swans) and lake views. Entry: ~$8 USD.
- Glaciarium Ice Museum (7 km from town): Excellent introduction to Patagonian glaciology with ice bar. Worth a visit if you arrive early. Entry: ~$25 USD.
- Supermarket stock-up: Grab snacks, water, and breakfast items for tomorrow's glacier day trip. Major chains: Carrefour, Super Los Lagos.
Lakefront Sunset:
Head to the Bahía Redonda area on Lago Argentino's shore (western edge of town) around 9 PM (summer) for spectacular sunset views. The lake's turquoise glacial water glows orange-pink at golden hour. Bring a jacket—the Patagonian wind is constant.
Evening: Dinner and Early Night
Restaurant Recommendations:
- Casimiro Biguá ($$$ - splurge): Legendary parrilla (grill) serving Patagonian lamb. Book ahead. Expect $40-60/person with wine.
- La Tablita ($$): Another excellent parrilla, slightly more casual. Famous for chorizo and steaks. $30-45/person.
- Pura Vida ($$ - mid-range): Cozy spot with pasta, trout, and local craft beers. $20-30/person.
- Mako Resto-Bar ($): Budget-friendly pizza, empanadas, and sandwiches. $12-18/person.
Early to Bed:
Tomorrow's Perito Moreno day trip starts early, so aim for a 10 PM bedtime. Most restaurants close around 11 PM anyway (small-town Patagonia keeps early hours despite long summer daylight).
Driving: 160 km round trip (2-3 hours total) Accommodation: El Calafate (same hotel) Highlights: Glacier viewpoints, boat tour, ice trekking option
Early Start: Drive to Los Glaciares National Park
Departure Time: 7:30-8:00 AM
The drive to Perito Moreno Glacier takes 90 minutes (80 km) on fully paved RP 11. This is an easy, scenic drive with the glacier anticipation building as you enter Los Glaciares National Park.
Driving Route:
- Head west from El Calafate on RP 11 (follow "Glaciar Perito Moreno" signs)
- Km 50: Enter Los Glaciares National Park (pay entry fee: ~$30 USD per person, cash/card accepted)
- Keep your ticket—you may be checked again at the glacier parking lot
- Km 70: First glacier views appear as the road descends
- Km 80: Arrive at parking area/visitor center
Fuel: Top off in El Calafate before departing. No fuel available at the glacier.
Morning: Perito Moreno Glacier Viewpoints
Parking and Orientation:
Park at the main lot (arrive before 10 AM to avoid tour bus crowds). From here, a network of metal walkways provides multiple viewpoints of the glacier's towering southern face.
The Glacier Experience:
Perito Moreno is one of Earth's few advancing glaciers—a 5 km wide, 60 meter tall wall of ice that calves (breaks off chunks) constantly. The thunderous cracks and crashes as house-sized ice blocks collapse into Lago Argentino are unforgettable.
Walkway Circuit (2-3 hours):
The southern walkways system offers viewing angles from:
- Upper balconies: Panoramic glacier and lake views
- Mid-level platforms: Eye-level with the glacier face, best for photography
- Lower platforms: Almost at water level, most dramatic perspective for calving
Photography Tips:
- Wide-angle lens captures scale (glacier is massive)
- Telephoto lens for detailed ice formations and calving action
- Video mode: Leave camera recording to capture calving (unpredictable but frequent)
- Golden hour (7-9 PM in summer) provides warm light on blue ice
Midday: Boat Tour (Optional but Recommended)
Safari Náutico (Traditional Boat Tour):
Departures every 30 minutes from pier near parking lot. This 1-hour tour navigates close to the glacier's southern face, providing perspectives impossible from walkways. You'll feel the temperature drop and hear the ice groan as you approach.
- Cost: ~$30 USD per person
- Tickets: Buy at pier or pre-book through your hotel
- Warm Layers: Essential—it's 5-10°C colder on the water
Alternative: Ice Trekking on Perito Moreno (Full Day Option):
If you're craving more adventure and have time flexibility, consider replacing the standard walkways/boat tour with a glacier ice trekking excursion:
- Mini-Trekking: 3-4 hours, includes 90 minutes walking on glacier with crampons. Moderate difficulty. ~$150 USD.
- Big Ice: 8-9 hours, includes 3.5 hours on glacier. Challenging. ~$250 USD.
Note: These require advance booking (often sells out days ahead in high season) and full-day commitment, so you'd skip the independent walkways exploration.
For this itinerary, we recommend the traditional walkways + boat approach to preserve afternoon flexibility.
Afternoon: Finish Glacier Visit and Return to El Calafate
After the boat tour, revisit your favorite walkway viewpoints or relax at the café with glacier views. Budget 1-1.5 hours for drive back to El Calafate.
Back in El Calafate:
- Downtime: Rest at hotel (tomorrow's drive is longer)
- Grocery run: Stock up on picnic supplies for tomorrow's El Chaltén drive
- Dinner: Try somewhere new (see Day 1 restaurant options)
- Pack up: Prepare for checkout tomorrow
Driving: 220 km (3 hours) Accommodation: El Chaltén Highlights: Scenic RN 40 drive, first Fitz Roy views, afternoon hike
Morning: Drive North on Legendary Ruta 40
Checkout: 9:00-9:30 AM (no need to rush—this is a short driving day)
The Route:
El Calafate to El Chaltén follows RN 40, Argentina's legendary north-south highway. This 220 km stretch is fully paved, well-maintained, and exceptionally scenic.
Driving Experience:
- First 50 km: Rolling steppe with Lago Argentino views to your left
- Km 50-100: Open Patagonian plains—you'll understand why they call this "the end of the world"
- Km 120: Lookout point with information panels about the region's ecology
- Km 150: Landscape transitions to more mountainous as you approach the Andes foothills
- Km 180: First Fitz Roy views! On clear days, the granite spires appear on the horizon
- Km 210: Junction with RP 23 (final 10 km approach to El Chaltén)
Wildlife Watching:
This drive is excellent for spotting:
- Guanacos: Llama relatives grazing in herds (often cross roads—drive carefully)
- Rheas: Large flightless birds that run alongside the road
- Foxes: Especially near dawn/dusk
- Condors: Soaring overhead
Fuel Stop:
No fuel between El Calafate and El Chaltén. Mandatory: Top off in El Calafate before departing. El Chaltén has limited fuel options (YPF station, often expensive—fill up only if needed for tomorrow's hike drive).
Midday: Arrive El Chaltén, Check In
El Chaltén Arrival (~12:00-12:30 PM):
El Chaltén is tiny—1,000 residents, 90% tourism-dependent. The entire town is walkable in 15 minutes. Follow signs to your accommodation (most are on San Martín or Lago del Desierto streets).
Check-In and Orientation:
Drop bags at your hotel/hostel. Most accommodations offer:
- Packed lunch preparation (order for tomorrow's full-day hike)
- Trail maps and advice
- Gear rental (trekking poles, crampons for ice)
Visitor Center (mandatory stop):
Walk or drive to the Visitor Center (northern edge of town) for:
- Free trail maps: Essential for tomorrow
- Weather forecast: Check conditions for your planned hike
- Trail conditions: Rangers update you on closures, river crossings, etc.
Afternoon: Short Acclimatization Hike
After lunch in town (empanadas at Ruca Mahuida or pizza at La Waflería), do a short hike to stretch your legs and get your first up-close Fitz Roy views.
Recommended: Laguna Capri Trail
- Distance: 7 km round trip
- Time: 2-3 hours
- Difficulty: Easy-moderate (some uphill)
- Trailhead: Northern edge of town (walkable or 5-minute drive)
- Highlights: Forest scenery, turquoise Laguna Capri with Fitz Roy reflected in calm weather
This shorter hike previews tomorrow's main event and helps you assess fitness levels.
Alternative: Mirador de Los Cóndores
If you want something even shorter (90 minutes round trip), this viewpoint offers panoramic town and valley views. Steep climb, great workout.
Evening: Prepare for Tomorrow's Big Hike
Town Dinner:
El Chaltén has surprisingly good food for such a small place:
- Patagotitan ($$): Craft beer and creative pub food
- La Tapera ($$): Traditional Argentine parrilla, lamb specialties
- Fuegia ($-$$): Empanadas, sandwiches, fast but hearty
Hike Preparation:
- Choose tomorrow's trail: Laguna de los Tres (Fitz Roy) OR Laguna Torre (see Day 4 for details)
- Pack your daypack: Water (3 liters per person), snacks, lunch, layers, rain gear, sunscreen, camera, headlamp
- Check weather forecast: Ask at hotel or visitor center
- Early to bed: Tomorrow starts before sunrise if you want Fitz Roy at dawn
Driving: None (or 5 km to trailhead if chosen) Accommodation: El Chaltén (same place) Highlights: Epic Patagonian trekking, glacier-fed lagoons, granite peaks
You've arrived at the jewel of this itinerary. Today is dedicated entirely to hiking in Los Glaciares National Park's northern sector—home to the most spectacular accessible mountain scenery in Patagonia.
Choose Your Adventure: Two Classic Hikes
You must choose between these two trails (doing both in one day is possible for ultrafit hikers but not recommended). Both are world-class.
Option A: Laguna de los Tres (Fitz Roy Viewpoint)
Stats:
- Distance: 20 km round trip
- Time: 8-10 hours
- Elevation gain: 750 meters
- Difficulty: Moderate-challenging (final 400m very steep)
The Experience:
This is THE iconic Patagonia hike. The trail climbs through lenga forest, crosses open valleys, and culminates in a brutal 45-minute scramble up a rocky headwall to Laguna de los Tres—a glacial tarn directly beneath Fitz Roy's 3,405-meter granite spire.
Detailed Route:
- Trailhead: El Chaltén northern edge (walkable from most accommodations)
- First 6 km (flat): Río Eléctrico valley, forested, easy hiking
- Km 6: Poincenot Camp (backcountry campsite)—good break spot
- Km 6-9: Gradual climb through alpine meadows
- Km 9-10 (final push): Steep, rocky climb up moraine wall (use hands occasionally)
- Laguna de los Tres: Mind-blowing views—Fitz Roy's jagged face reflected in turquoise water
Dawn Strategy (Recommended):
If weather permits, depart El Chaltén at 3:30-4:00 AM with headlamps to reach Laguna de los Tres for sunrise (~7:00 AM in summer). Dawn light on Fitz Roy is spectacular, and you'll have the viewpoint to yourself before crowds arrive.
After sunrise, descend and have breakfast at Poincenot Camp. This turns it into a 12-hour round trip (4 AM - 4 PM).
Alternative (Easier Timing):
Start at 8-9 AM for a more relaxed pace. You'll share the viewpoint with others but avoid pre-dawn darkness.
Option B: Laguna Torre (Cerro Torre Viewpoint)
Stats:
- Distance: 18 km round trip
- Time: 6-8 hours
- Elevation gain: 400 meters
- Difficulty: Moderate (steady uphill, less steep than Fitz Roy)
The Experience:
This trail leads to the base of Cerro Torre, one of the world's most difficult climbs—a razor-thin 3,128-meter granite needle often shrouded in clouds. The lagoon at trail's end is dotted with blue icebergs calved from Torre Glacier.
Detailed Route:
- Trailhead: Northern El Chaltén (same start as Fitz Roy trail)
- First 2 km: Shared with Fitz Roy trail, then branches right
- Km 2-9: Gradual climb through forest and meadows
- Km 9: Laguna Torre viewpoint—Cerro Torre rising above iceberg-filled lake
Why Choose Laguna Torre?
- Less crowded than Fitz Roy
- Slightly easier (less elevation gain, no final scramble)
- Better chance of good weather (lower altitude)
- Stunning iceberg-filled lagoon
- Still world-class scenery
Weather Consideration:
Fitz Roy creates its own weather—the peak is cloud-covered 60-70% of days. If the forecast shows clouds/wind, Laguna Torre may offer clearer views. Check with rangers at the Visitor Center.
Post-Hike Evening
After your epic trek, you'll be exhausted but exhilarated. Priorities:
- Shower (hot water never felt so good)
- Beer/Wine (you earned it—try a local Patagonian craft beer)
- Dinner (carb-load on pasta or pizza)
- Early sleep (tomorrow's border crossing day starts early)
Celebration Dinner:
- Estapa ($$$): Upscale for El Chaltén, fantastic lamb and wine selection
- Rancho Grande ($$): Huge portions, comfort food
- Domo Blanco ($-$$): Milanesas and empanadas, budget-friendly
Driving: 330 km (6-7 hours including border stop) Accommodation: Puerto Natales, Chile Highlights: International border crossing, transition to Chilean Patagonia
Today is a big driving day with a border crossing, so early start is essential. You'll leave Argentina's dry steppe and cross into Chile's greener landscapes, ending in the cozy gateway town for Torres del Paine.
Morning: Early Departure from El Chaltén
Checkout: 7:00-7:30 AM (most accommodations allow early checkout if you notify ahead)
Fuel: Top off at El Chaltén's YPF station before leaving town (next fuel is ~250 km away in Argentina or after crossing into Chile).
Drive South to Border
Route 1: El Chaltén to RN 40 (backtrack)
Drive the same 220 km you came from (back toward El Calafate) but:
- At Km 40 (from El Chaltén): Turn RIGHT onto RP 5 toward "Paso Cancha Carrera/Chile"
- This junction is well-signed ("Chile" and "Torres del Paine")
Route 2: RP 5 to Border (80 km)
This spectacular section crosses open pampa with Andes views ahead:
- Mostly paved, some gravel sections (road conditions vary annually)
- Very remote—no services, few other vehicles
- Wildlife common (guanacos, rheas, foxes)
Border Crossing: Cancha Carrera (Argentina) / Cerro Castillo (Chile)
Timing: Border is open 8:00 AM - 8:00 PM daily (check seasonal hours). Aim to arrive 10:00-11:00 AM to avoid afternoon bus tour rush.
Process (30 minutes - 2 hours depending on traffic):
Argentine Exit (Cancha Carrera):
- Park at border post
- Bring all passengers inside with passports
- Present passports at Argentine immigration window
- Receive exit stamp (sometimes they ask about your Chile plans—just answer honestly)
- Present vehicle documents at customs window
- Declare you're leaving Argentina temporarily with rental car (show authorization)
- Return to vehicle
No Man's Land (15 km):
Drive the neutral zone between borders (scenic road).
Chilean Entry (Cerro Castillo):
- Park at Chilean border post (bigger facility than Argentine side)
- All passengers bring passports inside
- Fill out Chilean entry form (pen and forms available)
- Agricultural inspection: CRITICAL—declare any fresh food (meat, dairy, fresh produce prohibited)
- Packaged snacks, bread, sealed items usually OK
- Fresh fruit, vegetables, cheese, deli meats will be confiscated
- Lying about food results in huge fines—just be honest
- Receive entry stamp at immigration window
- Vehicle inspection: sometimes trunk inspection for contraband
- Present rental car cross-border authorization (they'll make a copy)
Pro Tips:
- Have patience—this is a slow border
- Eat/discard any fresh food before crossing (or consume it at the border)
- Keep all paperwork accessible (passport, rental contract, cross-border permission)
- Cell service may be spotty—have offline maps ready
- Money exchange: Sometimes available at Chilean border but poor rates—better to use ATM in Puerto Natales
Drive to Puerto Natales (120 km)
Route: Chilean Route 9 (Ruta 9)
After clearing the border, you'll drive through Chilean Patagonia's vast sheep estancias toward Puerto Natales:
- Km 30 from border: Enter Torres del Paine commune
- Km 60: Junction with park access road (you'll come back here tomorrow morning)
- Km 120: Puerto Natales city limits
Fuel: First Chilean gas station is in Puerto Natales (~130 km from border). Ensure you have enough fuel from El Chaltén to make it.
Afternoon/Evening: Arrive Puerto Natales
Puerto Natales Arrival (~3:00-4:00 PM):
This charming waterfront town (population 20,000) is your Torres del Paine base. Most hotels are along Avenida Pedro Montt (waterfront promenade) or Baquedano street.
Check-In and Explore:
After checking in, stretch your legs with a town stroll:
- Costanera Waterfront: Scenic walk along Última Esperanza fjord (often spot flamingos, black-necked swans)
- Plaza de Armas: Main square with church, shops, restaurants
- Gear Shops: Last chance to buy/rent any missing items for tomorrow's Torres del Paine visit
Supermarket Stock-Up:
Hit a grocery store for tomorrow's park picnic lunch and snacks:
- Unimarc (largest selection, Baquedano street)
- Super Independencia (smaller, closer to waterfront)
Pack sandwiches, fruit, trail mix, chocolate—Torres del Paine has no restaurants outside the luxury lodges (which are expensive).
Evening: Relax and Prepare for Torres del Paine
Dinner:
Puerto Natales has excellent restaurants (benefiting from Torres del Paine tourism money):
- Afrigonia ($$$): Upscale, Patagonian lamb and seafood fusion
- Cervecería Baguales ($$): Local craft brewery with pub food, lively atmosphere
- El Living ($$): Cozy café-restaurant, great vegetarian options, coffee culture
- Mesita Grande ($-$$): Homestyle Chilean food, huge portions, budget-friendly
Weather Check:
Torres del Paine is famous for brutal, unpredictable weather. Check tomorrow's forecast:
- Ask at your hotel
- Visit local tour offices (they monitor park conditions closely)
- If forecast shows extreme wind (80+ km/h) or heavy rain: Consider shuffling to plan B activities (see Day 6 alternatives)
Pack for Tomorrow:
- Layers, layers, layers (morning: 5°C, afternoon: 20°C is normal)
- Rain jacket (mandatory)
- Warm hat and gloves (wind chill is serious)
- Sunscreen and sunglasses (UV intense)
- Full daypack with lunch, 3L water per person
Early to Bed:
Tomorrow is Torres del Paine day—the highlight of this entire trip. Get excited.
Driving: 200 km (5-6 hours total, spread throughout day) Accommodation: Puerto Natales (same hotel) Highlights: Paine Horns, Salto Grande, Grey Glacier, wildlife, iconic landscapes
This is the day you've been building toward. Torres del Paine is widely considered the most scenic national park in South America—a wonderland of granite towers, turquoise lakes, massive glaciers, and abundant wildlife. You'll complete a partial driving circuit of the park, stopping at viewpoints and short hikes.
Early Start: Drive to Torres del Paine
Departure: 6:30-7:00 AM (beat the tour bus crowds and catch wildlife)
Route: Puerto Natales to park entrance (75 km, 90 minutes)
- Head north on Route 9
- Km 16: Turn RIGHT at Torres del Paine junction (signed "Parque Nacional Torres del Paine")
- Km 46: Cueva del Milodón (prehistoric cave—optional 30-min stop, $8 entry)
- Km 59: Continue straight (ignore Estancia Puerto Consuelo turn-off)
- Km 75: Laguna Amarga Entrance Station
Park Entry:
- Fee: ~$40 USD per person (high season, cash/card accepted)
- Process: Show passport, receive map and regulations
- Keep ticket—may be checked again inside park
- Entry gates open at 8:30 AM (you'll likely be among first entries)
Morning Circuit: Laguna Amarga to Salto Grande (50 km)
From the entrance, follow the main park road clockwise around the circuit:
Stop 1: Laguna Amarga Viewpoint (10 minutes)
- Km 8: Pull into viewpoint parking
- Stunning first views of Paine Horns (Cuernos del Paine) reflected in Laguna Amarga
- Wildlife spotting: guanacos graze here often
- Photography: Best light is early morning (you're arriving perfectly)
Stop 2: Pudeto/Lago Pehoé Viewpoint (30 minutes)
- Km 25: Pudeto junction—turn LEFT toward Lago Pehoé (3 km detour)
- Park at Pudeto ferry dock area
- THE view: The most photographed angle in Torres del Paine—Paine Horns rising above electric blue Lago Pehoé
- On windy days (common), whitecaps on the lake create dramatic foreground
- Allow extra time here—this is postcard-perfect
Stop 3: Salto Grande Waterfall (45 minutes)
- Km 35: Pull into Salto Grande parking lot
- Short walk: 400 meters (5 minutes) on boardwalk to waterfall viewpoint
- The spectacle: Powerful waterfall where Lago Nordenskjöld drains into Lago Pehoé
- Paine Horns tower directly behind the falls
- Extended walk option: Cross the bridge and continue 20 minutes to Mirador Cuernos for another stunning angle
Wildlife Note:
This entire morning section is prime guanaco territory. Drive slowly and scan roadside—you'll likely see dozens. Also watch for foxes, rheas, and overhead condors.
Midday: Grey Glacier and Lunch (60 km)
Continue on park road:
- Km 45: Junction—turn RIGHT toward Guardería Grey (signed "Glaciar Grey")
- Next 15 km: Road becomes gravel (well-maintained), enters forested area
Stop 4: Grey Glacier Viewpoint (1.5-2 hours)
- Km 60: Arrive at Guardería Grey ranger station/parking
- Trail: 30-40 minute walk (2 km) through forest to Grey Glacier lookout
- The payoff: Massive Grey Glacier spilling down from the Southern Patagonian Ice Field, often with blue icebergs floating in Grey Lake
- Lunch spot: Perfect place to picnic at the viewpoint (bring your packed lunch from Puerto Natales)
Alternative (if weather is poor):
If the walk to Grey lookout is too windy/rainy, eat lunch in your vehicle at the parking area, then skip the trail and move to next stop.
Afternoon: Return Circuit and Wildlife
Backtrack to main road:
Drive back the way you came from Grey sector, then continue clockwise on park circuit.
Stop 5: Lago Nordenskjöld Beaches (flexible timing)
- Multiple pull-offs along the southeastern shore of Lago Nordenskjöld
- Turquoise water, weathered tree "sculptures," Paine Massif backdrop
- Great spot for photos if morning was cloudy (light changes constantly)
Stop 6: Laguna Azul (if time permits)
- Near park exit: Small detour to Laguna Azul viewpoint
- Less famous but beautiful lagoon with Torres (towers) visible in distance
Late Afternoon: Exit Park and Return to Puerto Natales
Departure from park: ~4:00-5:00 PM
Retrace Route 9 back to Puerto Natales (75 km, 90 minutes). You'll arrive with daylight remaining (summer sunset ~9:30-10:00 PM).
Fuel: Consider filling up in Puerto Natales if you're low—tomorrow's drive to Punta Arenas is long, though fuel is available en route.
Evening: Celebrate Your Patagonia Adventure
This is your last night in Patagonia proper—tomorrow you fly out. Celebrate your week of adventure with a nice dinner.
Celebration Dinner Options:
- Santolla ($$$): Upscale seafood, try the king crab (centolla) specialty
- Singular Patagonia Restaurant ($$$$): Splurge option, hotel restaurant with stunning fjord views, lamb dishes
- Cervecería Baguales (return—$$): Lively brewery atmosphere, compare notes with other travelers
Pack for Tomorrow:
You're checking out for good in the morning, so pack everything tonight except essentials.
Driving: 350 km (5 hours) Accommodation: None (day ends at airport) Highlights: Morning wildlife, Patagonian steppe drive, departure
Your final Patagonia day is primarily a transfer day, but with an early start you can squeeze in one more park visit or simply enjoy the long, meditative drive through Chilean Patagonia.
Option A: Early Morning Return to Torres del Paine (Recommended if Time Permits)
If your flight departure is after 4:00 PM, consider one final visit to Torres del Paine for sunrise/wildlife:
Plan:
- 5:30 AM departure from Puerto Natales
- Re-enter park at Laguna Amarga (show yesterday's ticket if same-day, otherwise pay again)
- Drive to Pudeto viewpoint for sunrise (6:30-7:00 AM)
- Wildlife watching as animals are most active at dawn
- Exit park by 8:30 AM
- Begin drive to Punta Arenas
Why Worth It:
Early morning in Torres del Paine is magical—no crowds, soft light, wildlife active. If weather was poor yesterday, this is a redemption opportunity. Many travelers regret not seeing dawn in the park.
Skip If:
Your flight departs before 3:00 PM (you'll be rushed).
Option B: Direct Drive to Punta Arenas
Departure: 8:00-9:00 AM from Puerto Natales
Route: Puerto Natales to Punta Arenas (250 km, 3.5 hours)
- Drive south on Route 9 from Puerto Natales
- Km 80: Cross into Punta Arenas commune
- Km 150: Enter northern suburbs of Punta Arenas
- Km 160: Follow signs to "Aeropuerto" or your car rental return location
Driving Experience:
This route crosses the Patagonian steppe—vast, windswept, desolate, and strangely beautiful. You'll understand why early explorers called this "the uttermost part of the Earth."
Fuel: Gas stations available in Puerto Natales and Punta Arenas. Fill up before returning rental car.
Wildlife: Watch for guanacos, rheas, and foxes along the highway. This area has large estancias (sheep ranches) with thousands of sheep.
Midday: Arrive Punta Arenas
Punta Arenas (~12:00-1:00 PM):
Chile's southernmost major city (population 130,000) sits on the Strait of Magellan. It's utilitarian but has a certain end-of-the-world charm.
If You Have Extra Time (3+ hours before flight):
- Plaza Muñoz Gamero: Historic main square with Magellan monument
- Mirador Cerro de la Cruz: Viewpoint over the Strait and city (15-min drive)
- Zona Franca (Duty-Free Zone): Shopping area (only interesting for last-minute gifts)
- Lunch: Try centolla (king crab) at La Marmita or La Luna for a final Patagonian meal
Car Rental Return:
Most agencies have offices both downtown and at the airport. Confirm your return location when you picked up the car.
Return Process:
- Arrive at rental agency 2+ hours before flight (allow buffer time)
- Agent inspects vehicle (photos you took on Day 1 protect you from false damage claims)
- Check for personal belongings (under seats, trunk, glove box)
- Fuel policy: Usually "full to full" (fill up before returning or pay inflated refueling fee)
- Confirm no additional charges
- Request printed receipt/invoice
Afternoon: Airport and Departure
Punta Arenas Airport (PUQ):
Small, efficient airport. Allow 90 minutes for domestic flights to Santiago, 2 hours for international.
Check-In:
Most flights to Santiago (capital) depart 3:00-7:00 PM. LATAM and Sky Airlines operate this route multiple times daily.
Reflect on Your Journey:
As you sit at the gate, review your camera roll. In seven days, you've witnessed:
- ✅ The massive Perito Moreno Glacier calving into Lago Argentino
- ✅ The granite spires of Fitz Roy glowing at sunrise
- ✅ The turquoise perfection of Laguna de los Tres
- ✅ An international border crossing through Patagonian wilderness
- ✅ The iconic Paine Horns reflected in Lago Pehoé
- ✅ Grey Glacier's blue ice descending from the ice cap
- ✅ Guanacos, rheas, foxes, condors, and flamingos in the wild
- ✅ Some of the windiest, most dramatic, most unforgettable landscapes on Earth
You've completed the ultimate Patagonia road trip.
Best Time to Go
High Season: December - February (Summer)
- Pros: Warmest weather (10-20°C daily highs), all roads and trails open, 18+ hours of daylight, wildflowers blooming
- Cons: Highest prices (accommodation 2-3x low season), crowds at Torres del Paine and Perito Moreno, advance booking essential, strongest winds
Shoulder Season: November & March (Recommended)
- Pros: 30-50% lower prices, fewer crowds, still mostly good weather, fall colors (March), wildlife more active
- Cons: Some accommodation closed, cooler temperatures (5-15°C), shorter days, occasional snow at higher elevations
Low Season: April - October (Winter)
- Cons: Most accommodations and services closed, severe weather, short days (8-10 hours), snowfall, some roads impassable
- Not recommended for this itinerary (Torres del Paine and hiking trails challenging/closed)
Verdict: This itinerary works best November through March, with November and March offering the best value-to-experience ratio.
Rental Car Considerations
Vehicle Type:
- Minimum: Compact 2WD sedan (possible in summer on this all-paved-roads itinerary)
- Recommended: Mid-size SUV 2WD (better comfort, storage, and wind stability)
- Optimal: Mid-size SUV 4WD (peace of mind, better handling on Torres del Paine's gravel roads)
Essential Features:
- Cross-border authorization (Argentina-Chile crossing on Day 5)
- Spare tire + jack (verify condition)
- GPS or smartphone mount for navigation
- Adequate insurance (CDW minimum, full coverage recommended given gravel roads)
Where to Rent:
- El Calafate: Airport location (most convenient)
- One-way drop: Confirm Punta Arenas drop-off allowed (most agencies permit with fee ~$100-200)
Booking:
Reserve 2-3 months ahead for December-January travel. Use comparison sites (Rental Cars, Auto Europe) but verify directly with company about cross-border permissions.
See our complete Car Rental Guide for detailed recommendations.
Border Crossing Requirements
Documents Needed:
- Passport (valid 6+ months)
- Rental car contract
- Cross-border authorization letter from rental company (in Spanish)
- Driver's license + International Driving Permit (IDP recommended but not always required)
Prohibited Items (Chile):
- Fresh fruit, vegetables
- Dairy products
- Fresh/cured meats
- Plants, soil, seeds
Process Time: 30 minutes - 2 hours (peak season can be slow)
Border Hours: 8:00 AM - 8:00 PM daily (verify before Day 5)
See our Border Crossing Guide for step-by-step process.
Fuel Planning
Fuel Availability:
- El Calafate: Multiple stations (YPF, Shell)
- El Chaltén: One YPF station (limited hours, higher prices)
- Puerto Natales: Several stations (Copec, Shell, YPF)
- Punta Arenas: Full fuel infrastructure
Critical Fuel Stops:
- Before leaving El Calafate (Day 3): Fill up completely
- Before leaving El Chaltén (Day 5): Fill up completely (next fuel 250+ km)
- In Puerto Natales (Day 6 evening): Top off for Day 7
Fuel Costs:
- Argentina: ~$0.80-1.20 USD/liter
- Chile: ~$1.20-1.50 USD/liter (more expensive)
Budget for Fuel: ~$150-200 USD total for this itinerary (mid-size SUV)
See our Fuel Stations Guide for detailed station locations.
El Calafate (2 nights)
Budget ($40-80/night):
- America del Sur Hostel - Central location, kitchen, social atmosphere
- Hostel del Glaciar Pioneros - Clean dorms, near Laguna Nimez
Mid-Range ($80-150/night):
- Alto Calafate Hotel - Hillside views, quiet location, breakfast included
- Esplendor by Wyndham - Downtown, modern, rooftop bar
Splurge ($200+/night):
- Eolo Patagonia's Spirit - Luxury estancia 30 km from town, spectacular
- Los Sauces Casa Patagónica - Boutique lake views, gourmet breakfast
El Chaltén (2 nights)
Budget ($35-70/night):
- Rancho Grande Hostel - Legendary among backpackers, lively bar
- Condor de los Andes - Good value private rooms, central
Mid-Range ($90-180/night):
- Senderos Hostería - Comfortable, mountain views, helpful owners
- Destino Sur - Modern rooms, excellent breakfast, gear rental
Splurge ($250+/night):
- Aguas Arriba Lodge - Riverside luxury, gourmet meals
- Kalenshen Patagonia - Panoramic Fitz Roy views, spa
Puerto Natales (2 nights)
Budget ($40-85/night):
- Erratic Rock Hostel - Backpacker favorite, free Torres del Paine orientation talk
- Hostel Amerindia - Central, kitchen, social
Mid-Range ($90-160/night):
- Hotel Costaustralis - Waterfront location, excellent breakfast
- The Singular Patagonia - Converted cold storage plant, unique architecture (rooms vary in price)
Splurge ($200+/night):
- The Singular Patagonia (suites) - Luxury rooms, spa, amazing restaurant
- Remota Patagonia - Design hotel, all-inclusive option, outside town
Booking Tips:
- Reserve El Chaltén and Puerto Natales accommodations 2-3 months ahead for December-January
- El Calafate has more availability but still book early
- Many hotels offer free cancellation up to 7-14 days before—book early, adjust later if needed
Clothing (Layering System)
Base Layer:
- Merino wool or synthetic long underwear (top and bottom)
- 2-3 moisture-wicking t-shirts
- 1-2 long-sleeve shirts
Mid Layer:
- Fleece jacket or synthetic puffy jacket
- Lightweight down jacket (packable)
Outer Layer:
- Waterproof/windproof rain jacket (mandatory)
- Rain pants (highly recommended for hiking)
Bottom:
- 2 pairs hiking pants/leggings (quick-dry)
- 1 pair casual pants/jeans for town
Accessories:
- Warm beanie/winter hat (wind chill is serious)
- Sun hat with brim
- Buff/neck gaiter (wind protection)
- Gloves (warm fleece or wool)
- Wool socks (3-4 pairs)
- Sunglasses (high UV in Patagonia)
Footwear
- Hiking boots: Ankle support, waterproof, broken in (mandatory for Day 4)
- Casual shoes: For driving and town (sneakers or light boots)
- Sandals/flip-flops: For hostel showers
Gear
Daypack (25-35L):
For Day 4 full-day hike and other day trips
Trekking Poles:
Optional but helpful (especially for Fitz Roy descent)—can rent in El Chaltén if not bringing
Hydration:
- Water bottles or hydration reservoir (3L capacity total per person)
- Water purification tablets (optional—streams are generally safe but having backup is smart)
Navigation:
- Downloaded offline maps (Maps.me or Google Maps offline)
- Physical map (free at visitor centers)
- Backup battery pack for phone
Photography:
- Camera + extra batteries
- Wide-angle lens (landscapes)
- Telephoto lens (wildlife)
- Lens cloth (dust/wind protection)
- Dry bag (rain protection)
Other Essentials
- Sunscreen (SPF 50+, UV is intense)
- Lip balm with SPF
- First aid kit (blisters, pain reliever, altitude meds if sensitive)
- Headlamp or flashlight (early hikes, emergencies)
- Multi-tool or knife
- Duct tape and zip ties (emergency car repairs)
- Reusable shopping bags (some Chilean stores charge for bags)
- Toilet paper and hand sanitizer (backcountry bathrooms basic)
- Snacks from home (energy bars, electrolyte packets—expensive in Patagonia)
What NOT to Pack:
- Cotton clothing (doesn't dry, terrible in rain)
- Heavy luggage (you're moving every 1-2 days, keep it minimal)
- Unnecessary electronics (focus on the experience)
Per Person Cost Estimates (7 Days)
These estimates assume 2 people sharing costs.
Budget Traveler ($1,000-1,400 USD)
- Car rental: $450/week ÷ 2 = $225
- Fuel: $180 ÷ 2 = $90
- Accommodation: $50/night × 6 nights = $300
- Food: $25/day × 7 = $175
- Activities: Park entrances ($30 + $40), boat tour ($30) = $100
- Border/misc: $50
- Total: ~$1,100
Budget Approach:
- Camping or hostel dorms
- Self-catering most meals
- Skipping paid activities beyond park entrances
- Sharing rental car with 2-4 people
Mid-Range Traveler ($1,700-2,400 USD)
- Car rental: $700/week ÷ 2 = $350
- Fuel: $180 ÷ 2 = $90
- Accommodation: $120/night × 6 nights = $720
- Food: $50/day × 7 = $350
- Activities: Parks, boat tour, ice trek mini = $280
- Border/misc: $80
- Total: ~$2,050
Mid-Range Approach:
- Private rooms in hostels or budget hotels
- Mix of restaurants (dinner) and self-catered (breakfast/lunch)
- One splurge activity (glacier ice trek)
- 2-3 people sharing SUV
Comfort/Splurge Traveler ($3,000-4,500 USD)
- Car rental: $1,000/week (4WD SUV) ÷ 2 = $500
- Fuel: $200 ÷ 2 = $100
- Accommodation: $200/night × 6 nights = $1,200
- Food: $100/day × 7 = $700
- Activities: Parks, boat tour, Big Ice trek, extra tours = $500
- Border/misc: $150
- Total: ~$3,400
Splurge Approach:
- 3-4 star hotels, some boutique properties
- All restaurant meals, wine with dinner
- Multiple paid activities and tours
- Premium vehicle, just 2 people sharing
Money-Saving Tips
- Travel in shoulder season (November or March): Save 30-50% on accommodation
- Share rental car among 3-4 people: Splits cost dramatically
- Self-cater breakfasts and pack lunches: Restaurants are pricey, supermarkets reasonable
- Book accommodations with breakfast included: Saves $10-15/day
- Bring snacks from home: Energy bars, instant coffee, electrolyte packets
- Fill up fuel in Argentina: Consistently cheaper than Chile
- Free hiking: Days 3-4 (El Chaltén hikes) are free world-class experiences
- Limit paid activities: Park entrances are mandatory, but tours like ice trekking are optional
What's Not Included
These budgets don't include:
- Flights to El Calafate / from Punta Arenas (varies by origin)
- Travel insurance (recommended: ~$50-100)
- Souvenirs and shopping
- Alcohol beyond basic wine/beer with dinner
- Tips (not always expected but appreciated for good service)
Is 7 days enough for this itinerary?
Yes, but it's fast-paced. This itinerary is optimized for travelers with limited time who want to see the absolute highlights. You'll have 1-2 long driving days (Day 5 and Day 7) and won't have much downtime. If you have 10-14 days, consider adding:
- Extra day in El Chaltén (hike both Fitz Roy AND Laguna Torre)
- Extra day in Torres del Paine (W Trek first day or more viewpoints)
- Perito Moreno ice trekking (requires full day)
Can I do this in winter (June-August)?
Not recommended. Many accommodations close, weather is severe (below freezing, frequent snow), days are very short (9-10 hours of daylight), and some roads/trails become impassable. If you must travel in winter:
- El Calafate remains accessible year-round (Perito Moreno stays open)
- El Chaltén becomes nearly deserted, many trails dangerous due to ice
- Torres del Paine is extremely challenging (brutal wind, snow, most facilities closed)
Do I need 4WD?
Not essential but beneficial. This itinerary stays on paved roads except within Torres del Paine (well-maintained gravel). A 2WD vehicle can complete it in summer, but 4WD provides:
- Better stability in Patagonia's infamous wind
- More confidence on Torres del Paine's gravel roads
- Improved traction if you encounter wet conditions
If you're experienced with gravel driving and traveling in summer, 2WD is acceptable. First-timers or shoulder season travelers should consider 4WD.
What if weather ruins my Torres del Paine day?
Patagonia weather is unpredictable. If Day 6 brings extreme wind (80+ km/h) or heavy rain:
Alternative Activities:
- Spend extra time in Puerto Natales (museums, waterfront walks, cafés)
- Visit Cueva del Milodón (prehistoric cave, 25 km north of Puerto Natales)
- Take a boat tour of Última Esperanza Fjord
- Attempt entering park early (conditions change rapidly)
- Extend El Chaltén stay by one day (if you have flex in schedule)
Don't force it: Torres del Paine in extreme weather is miserable and potentially dangerous. The park will still be there on your next Patagonia trip.
Can I do this itinerary in reverse?
Yes, but less optimal. Flying into Punta Arenas and out of El Calafate works logistically but:
- Cons: Flights to Punta Arenas are often more expensive, you'd experience Torres del Paine first (making El Chaltén feel anticlimactic), border crossing direction slightly more complex
- Pros: None significant
Verdict: Stick with the described routing unless you have compelling reasons to reverse.
Is the border crossing difficult?
No, but it takes time. The Cancha Carrera/Cerro Castillo crossing is straightforward:
- Process is in English and Spanish
- Officials are accustomed to tourists
- Main challenge: Chilean agricultural inspection (just don't bring prohibited food)
Tips:
- Arrive mid-morning (avoid afternoon tour bus rush)
- Be honest about food items (confiscation is fine, fines are not)
- Have all paperwork accessible (passport, rental contract, authorization)
- Be patient—expect 30 min to 1.5 hours total
How much Spanish do I need?
Basic Spanish is helpful but not essential. In main tourist areas (El Calafate, El Chaltén, Puerto Natales, Torres del Paine), many people speak some English. However:
Learn these phrases:
- "Lleno, por favor" (Fill it up, please—gas stations)
- "¿Dónde está...?" (Where is...?)
- "¿Cuánto cuesta?" (How much does it cost?)
- "No entiendo" (I don't understand)
- "¿Habla inglés?" (Do you speak English?)
Download Google Translate offline for Spanish—it works without cell service.
What about cell phone service?
Spotty in remote areas. Expect:
- Good: El Calafate, El Chaltén, Puerto Natales, Punta Arenas
- Intermittent: RN 40 highway, border crossing
- None: Torres del Paine interior, some stretches between towns
Preparation:
- Download offline maps before leaving towns
- Screenshot important information (accommodation addresses, confirmation codes)
- Don't rely on connectivity for navigation or emergencies
Carriers:
- Argentina: Claro, Personal, Movistar
- Chile: Entel, Movistar, Claro
SIM cards: Available at airports and town shops (~$20-30 for tourist data packages).
Can I camp instead of staying in hotels?
Yes, with caveats. Camping can save money but adds complexity:
Campgrounds:
- El Calafate: Few official campgrounds (not a camping-focused town)
- El Chaltén: Excellent free campground in town (basic facilities)
- Puerto Natales: Hostel campgrounds available ($10-15/person)
- Torres del Paine: Multiple campgrounds inside park ($10-30/person)
Considerations:
- Gear volume: You'll need tent, sleeping bag, mat, cooking equipment—lots of car space
- Weather: Patagonian camping is cold and windy (even summer)
- Convenience: After long driving/hiking days, hotel showers and beds are wonderful
- Cost savings: Moderate (save $40-80/night but invest in gear rental if you don't own)
Verdict: If you're experienced campers and want the adventure, go for it (especially El Chaltén and Torres del Paine). First-timers should consider hostel/hotel comfort.
Is this itinerary safe for solo travelers?
Yes, very safe. Patagonia has low crime rates and a well-established solo travel culture, especially in El Chaltén (backpacker central). Considerations:
- Solo car rental: More expensive (no cost-sharing) but doable
- Hiking alone: Trails are well-marked and well-traveled; still inform someone of plans
- Accommodation: Hostels are social; easy to meet other travelers for hikes/meals
- Border crossing: No issues crossing solo
Solo-specific tips:
- Stay in social hostels to find potential hiking partners
- Join group tours for activities if you want company (Perito Moreno boat tour, etc.)
- Check in with accommodation staff daily about your plans
What's the altitude like? Will I get altitude sickness?
Minimal concern. Unlike many Andean destinations:
- El Calafate: 220m elevation
- El Chaltén: 400m
- Puerto Natales: 50m
- Torres del Paine: Base 50-200m, highest hikes ~1,200m
Verdict: Altitude is a non-issue for this itinerary. Even sensitive individuals won't experience symptoms.
You now have a complete roadmap for the ultimate week in Patagonia. This itinerary delivers the region's absolute highlights in a logical, efficient route that balances driving, hiking, and pure wonder.
From the massive wall of Perito Moreno Glacier to the needle-sharp peaks of Fitz Roy to the postcard-perfect Paine Horns, this journey showcases why Patagonia captivates travelers like nowhere else on Earth.
Next Steps
- Book your flights: El Calafate (FTE) arrival, Punta Arenas (PUQ) departure
- Reserve your rental car: 3-6 months ahead for summer travel (don't forget cross-border authorization)
- Book key accommodations: El Chaltén and Puerto Natales fill up fast
- Get travel insurance: Covers medical, trip cancellation, and vehicle coverage gaps
- Study our detailed guides: Car Rental, Border Crossing, Fuel Stations
- Start training: Day 4's Fitz Roy hike is challenging—build fitness now
The adventure of a lifetime awaits. Patagonia is calling.
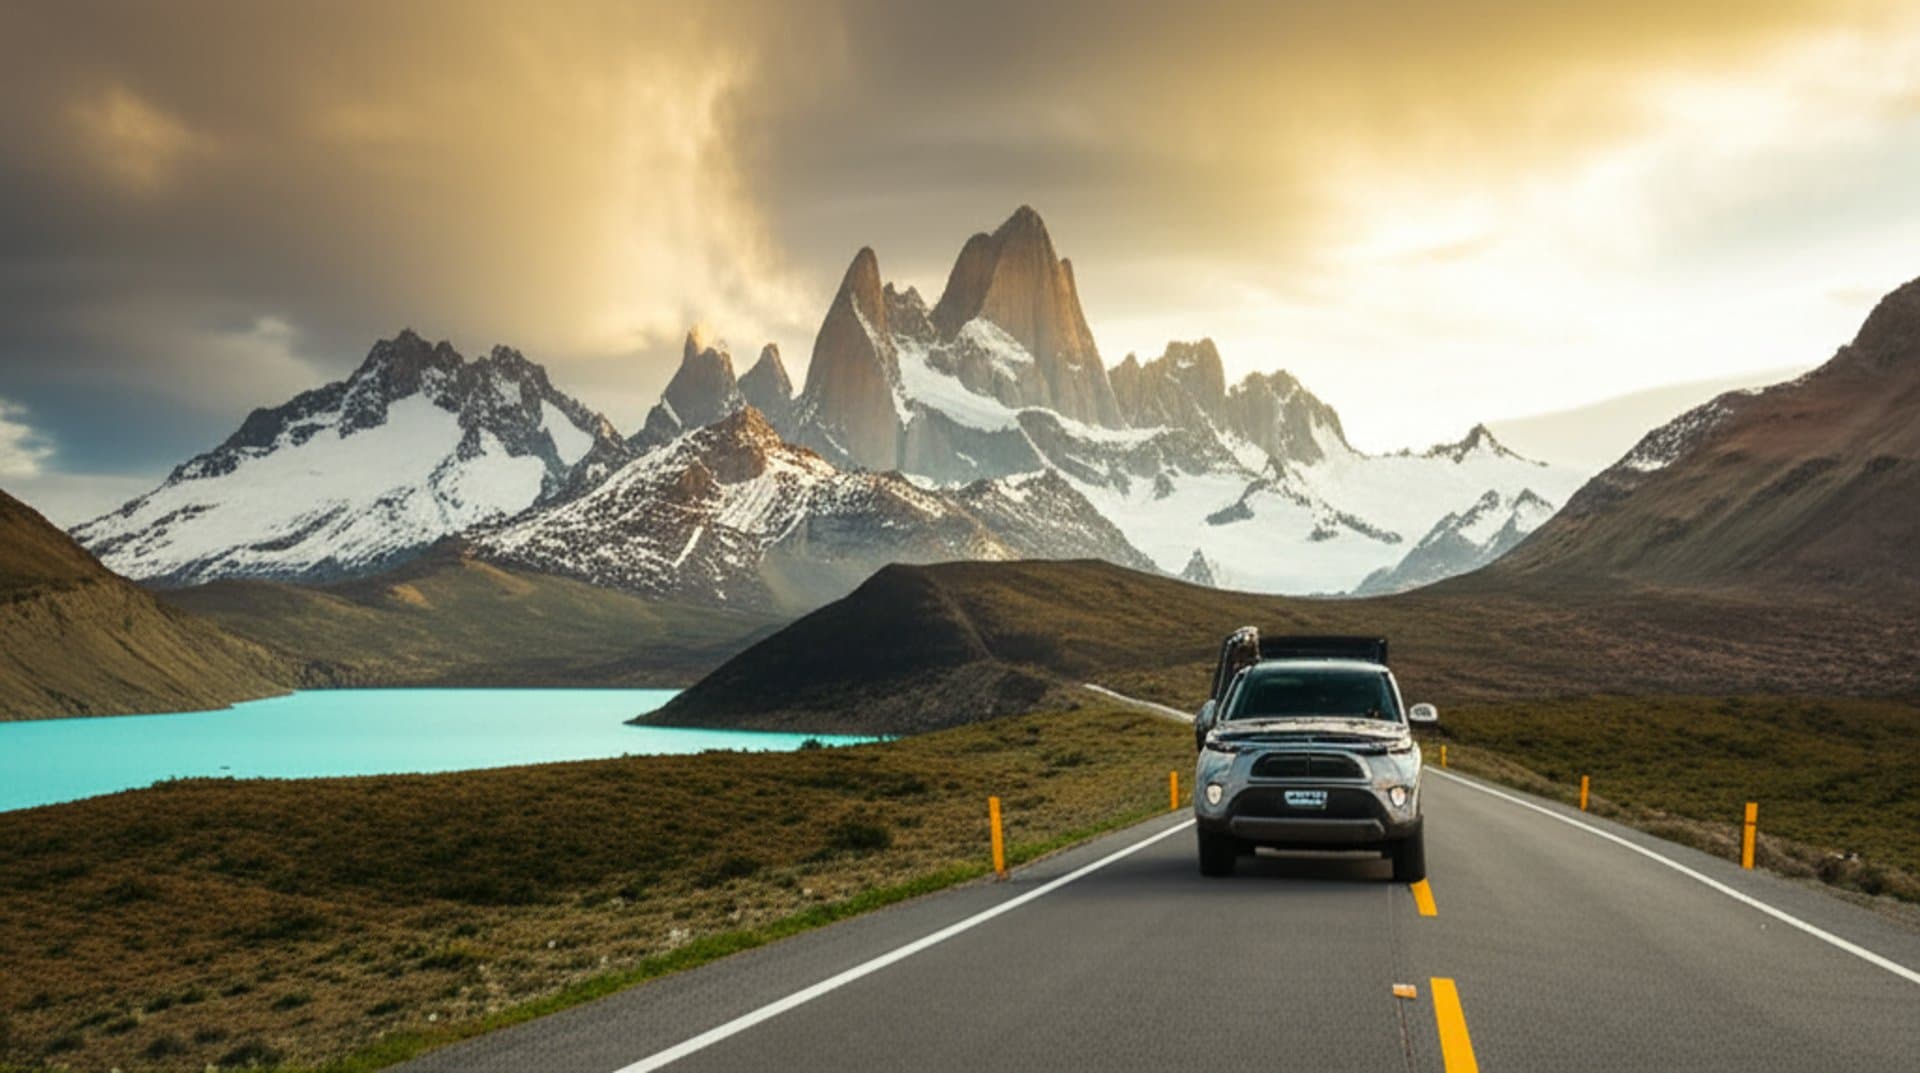
Image Generation Prompt
Epic wide-angle photograph of a rental SUV driving on the scenic Route 40 highway with Mount Fitz Roy and Cerro Torre peaks towering in the background, turquoise glacial lake beside the road, dramatic Patagonian clouds at golden hour, sense of adventure and freedom